Remove Duplicate Emails in Excel Safely: 4 Methods
Learn how to remove duplicate emails in Excel with Remove Duplicates, formulas and Power Query, without losing the data you need to keep.
You're getting a meeting notice ready, and the membership spreadsheet has the same neighbor listed under slightly different names. Some addresses have trailing spaces, another row contains only a name, and a shared household inbox appears beside different members. Clicking a cleanup button looks tempting, but which names, payment notes, and mailing preferences will disappear with the repeated rows?
To remove duplicate emails in Excel safely, separate the membership record from the sending list. Keep the original information, decide what counts as a duplicate, and choose the surviving record before deleting anything.
Table of Contents
- Pick the Right Method for Your Email List
- Back Up and Normalize Addresses First
- Flag Duplicates Before Anything Is Deleted
- Decide Shared and Malformed Addresses
- Keep the Right Record and Run Remove Duplicates
- Repeat the Cleanup with Power Query
- Confirm the Clean List Before You Send
Pick the Right Method for Your Email List
For a one-off cleanup of a copied list, Data > Remove Duplicates is the fastest route, but it permanently removes matching entries from the selected data.
The right tool depends on whether you're ready to delete records or still need to understand them. A highlight is useful for review; a distinct-address list is useful for sending. Neither automatically settles conflicting member information.
Methods for removing duplicate emails in Excel
| Method | Best for | What survives | Main risk | |---|---|---|---| | Data > Remove Duplicates | One-off cleanup of a copied list | First occurrence of each match | Permanently deletes duplicate rows within the selected range | | COUNTIF helper column | Reviewing duplicates before deleting | Every row, with a count flag | No deletion, but needs manual review | | Conditional Formatting | Quick visual check of a short list | Every row, highlighted | Doesn't remove anything | | UNIQUE function | Building a clean copy elsewhere | Distinct values; source untouched | Requires an Excel version that supports UNIQUE | | Power Query | Repeating cleanup on new exports | Refreshable clean copy; source untouched | Longer setup the first time |
- Need a clean copy of a list you understand? Use Remove Duplicates.
- Received entries from several people? Flag duplicates before deleting.
- Receive a fresh export regularly? Build a Power Query.
Say you're working with a member list where the same neighbor appears under different spellings of their name, but the email address matches after cleanup. That's straightforward only if their attached information agrees.
Practical rule: A repeated address is a reason to inspect records, not permission to discard them.
Prepare the addresses, flag the matches, and settle exceptions before using any destructive command.
Back Up and Normalize Addresses First
Stray spaces and invisible characters can prevent apparently identical addresses from matching. Capitalization usually isn't the problem: Remove Duplicates and COUNTIF ignore letter case, while EXACT is case-sensitive. Lowercasing still gives you a consistent field to inspect and export.
Keep raw emails in column A and create a Cleaned Email column in B. Leave names, membership identifiers, consent information, and notes attached to their original rows.
-
Copy the whole worksheet. Right-click its tab, choose Move or Copy, and select Create a copy. Rename the working sheet clearly, such as
Members Working, and leave the original untouched. -
In B2, enter
=LOWER(TRIM(CLEAN(A2))). This standardizes case, trims ordinary leading and trailing spaces, and removes the nonprinting characters thatCLEANhandles. -
Fill the formula through every member row. Compare changed results with the originals, especially entries copied from web forms or documents. To identify changes precisely, use
=NOT(EXACT(A2,B2))in another helper column and filter forTRUE. -
Scan for malformed entries. A missing
@, a name instead of an address, or several addresses in the same cell needs review rather than duplicate removal. -
Freeze the reviewed results. Copy the cleaned helper column and use Paste Special > Values into a separate export column or working copy. Keep the raw column available so you can explain any correction later.
Keep cleanup separate from validation
This formula isn't a complete email validator, and TRIM and CLEAN don't remove every possible Unicode spacing character. If a suspicious pair still won't match, inspect the text rather than assuming the addresses belong to different inboxes.
A distinct list is another non-destructive option. Microsoft's UNIQUE function documentation explains how to return distinct values and distinguish them from values appearing exactly once.
Before exporting formula results, use the Excel import formula guide to prepare the import field. A clean email column still isn't a clean membership register: different members may legitimately share it.
Flag Duplicates Before Anything Is Deleted
Add a Match Count column beside Cleaned Email and count matches against the cleaned values, not the raw entries. Use =COUNTIF(cleaned_range,cleaned_cell), replacing those placeholders with actual references to column B.
Lock the full range with dollar signs, leave the current row reference relative, and fill down. The range must end at your actual last member row, not an arbitrary cutoff that leaves later records unchecked.
Formulas for finding duplicate emails
| Formula | Returns | Use it when |
|---|---|---|
| =LOWER(TRIM(CLEAN(A2))) | Standardized text from the raw email cell | Preparing addresses for comparison |
| =COUNTIF(cleaned_range,cleaned_cell) | How many times this address appears in the range | Flagging every repeat without deleting it |
| =UNIQUE(cleaned_range) | One copy of each distinct address | Building a clean list on a new sheet |
| =UNIQUE(cleaned_range, TRUE) | Only addresses that appear exactly once | Separating single entries from repeated ones |
The UNIQUE results spill into the cells below the formula, so leave that destination clear. Exclude headers and blank rows from the input range.
Read the flag alongside the member details
A count above one means the address repeats. Matching names suggest a duplicate record, but check the member identifiers and notes before concluding that they represent the same person. Different names may indicate a shared inbox.
For a visual check, select Cleaned Email and choose Home > Conditional Formatting > Highlight Cells Rules > Duplicate Values. Highlighting helps you inspect matching entries without changing the underlying records.
Keep the original rows visible while reviewing the highlighted addresses.

Don't substitute an exactly-once list for a deduplicated sending list. It excludes repeated addresses entirely, including valid members whose records were entered again.
If organizers repeatedly overwrite each other's corrections, Spreadsheet Upgrade's discussion of stronger controls for Excel master data offers useful context. Assigning an owner to the master list matters as much as choosing the formula.
Decide Shared and Malformed Addresses
An email address identifies an inbox, not necessarily a person. A household may share an address while maintaining separate memberships, dues records, or voting rights. Removing a member from the register to simplify delivery would solve the wrong problem.
Put questionable entries in review
Filter Cleaned Email using Text Filters > Does Not Contain and enter @. Copy those records to a Review sheet, along with their names and membership details, then exclude them from the export until corrected.
Also inspect blanks, embedded spaces, and cells containing multiple addresses. An @ check catches obvious mistakes; it doesn't establish that an address exists or belongs to the member.
Don't guess a correction from someone's name. Ask the member or the responsible organizer to confirm it, and record what was changed.
Choose the rule for shared inboxes
Use the exactly-once output to separate uncomplicated addresses from the repeat-review queue. Then compare the repeated entries by name, member identifier, consent status, and mailing preference.
| Situation | Record-keeping decision | Sending decision | |---|---|---| | Same member entered again | Consolidate verified details into a surviving record | Retain the intended address | | Different members sharing an inbox | Preserve separate memberships | Decide whether the message needs separate or household delivery | | Unclear identity or conflicting preference | Keep the records pending review | Hold the disputed entry out | | Malformed address | Preserve the member record and request correction | Don't import the malformed value |
Add a Decision column with entries such as Shared inbox, retain members, Merge details, or Awaiting correction. A written decision prevents the next volunteer from undoing careful work.
Keep separate member records when membership matters. Build a separate address-level list when delivery is the task.
For a discussion group, consider who can see addresses and replies using these email list privacy practices. For an editorial mailing rather than member discussion, SendX's newsletter recommendations for publishers can help you think through the format, but they don't replace member consent or your shared-inbox decision.
Keep the Right Record and Run Remove Duplicates
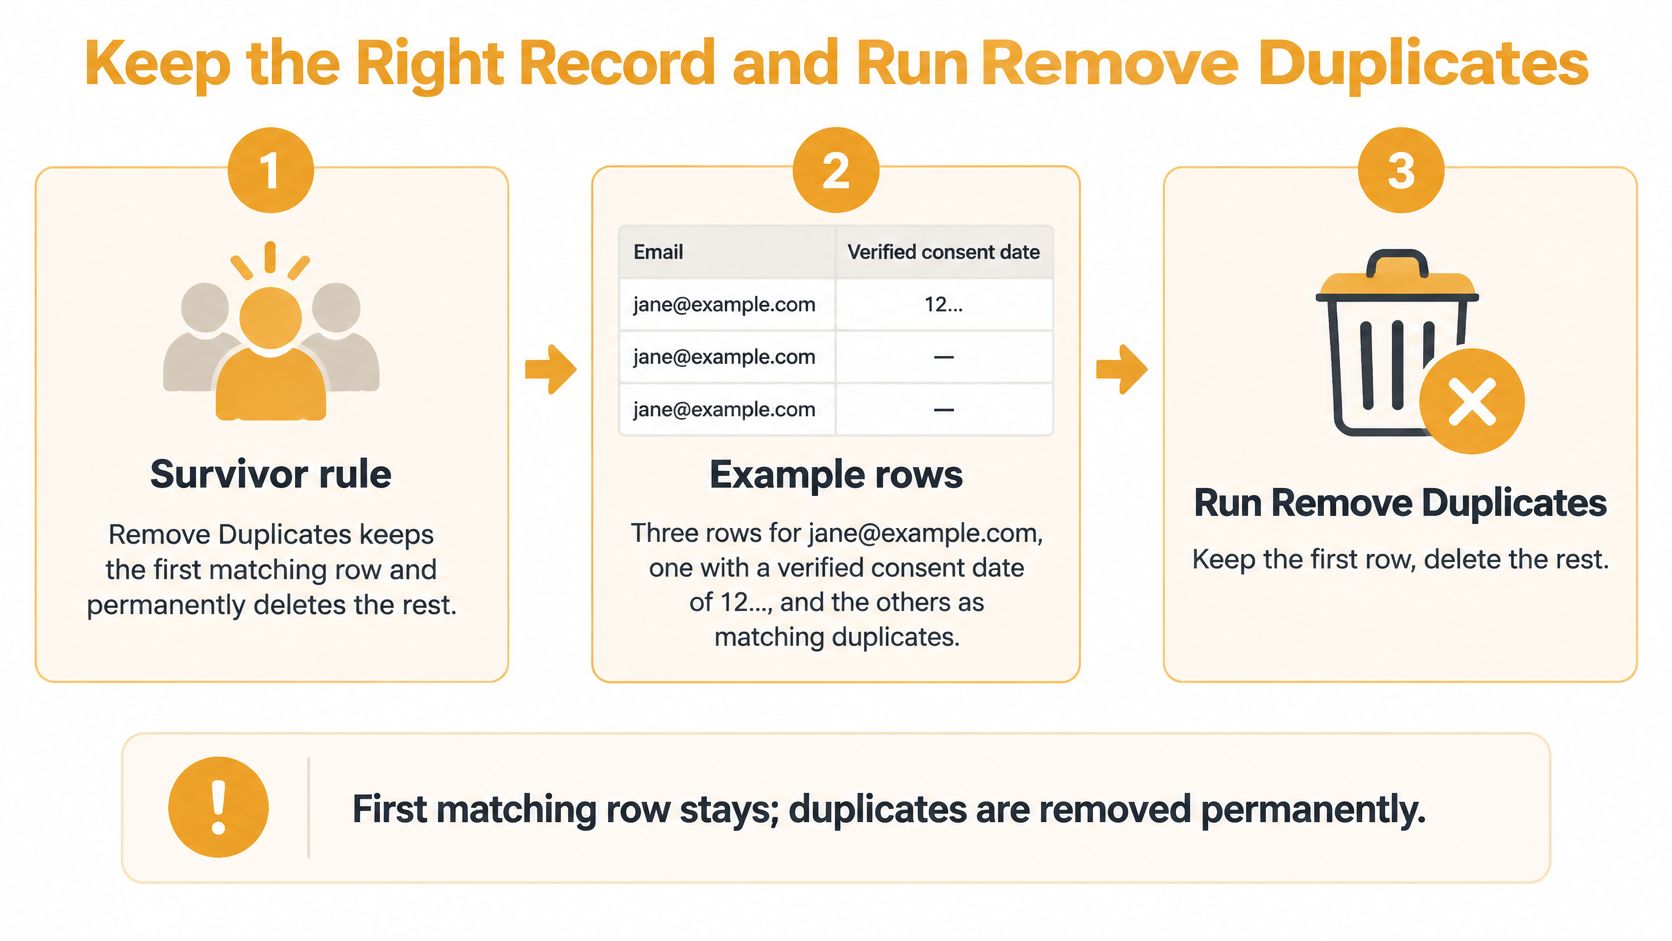
Define the survivor rule before opening the dialog. Microsoft's duplicate-removal instructions state that Excel keeps the first occurrence and uses the selected comparison columns to identify matches.
Suppose repeated records for [email protected] contain a current confirmed preference, an older registration, and a dues-payment note. Sort the whole table so the approved record comes first, then transfer any information that must remain in the active register. Don't assume Excel merges notes from discarded records.
Microsoft also recommends copying the original range before removing duplicates, because the operation permanently deletes duplicate data. Keep a Review copy with the survivor's member identifier recorded beside each discarded record.
Select the range and comparison key separately
Select the full table to preserve row integrity. Inside the dialog, check only Cleaned Email when the objective is address-level uniqueness. Include a member identifier or name only when those fields belong in the duplicate definition.
- Select the complete working range, including its header and every attached member column.
- Open Data > Remove Duplicates.
- Tick My data has headers.
- Untick columns that aren't part of your chosen comparison key.
- Click OK and record the removal summary before dismissing it.
Don't trust automatic range detection when blank rows or columns interrupt the list. Check the selection boundary yourself; selecting only the email cells can leave names and notes outside the operation.
The process is simple only after the retention decision is settled.
If the result is unexpected, use Undo immediately, inspect the range and comparison columns, and rerun on the working copy. For recurring administrative work, CodeWords offers a guide to recurring spreadsheet cleanup, useful once your retention rules are explicit rather than improvised.
Repeat the Cleanup with Power Query
A recurring export is a good candidate for Power Query because you can save the transformations instead of remembering them each time. The initial setup takes more attention than clicking Remove Duplicates, but subsequent refreshes reuse the recorded steps.
Keep the query's input table separate from its output, as you would in this working setup.
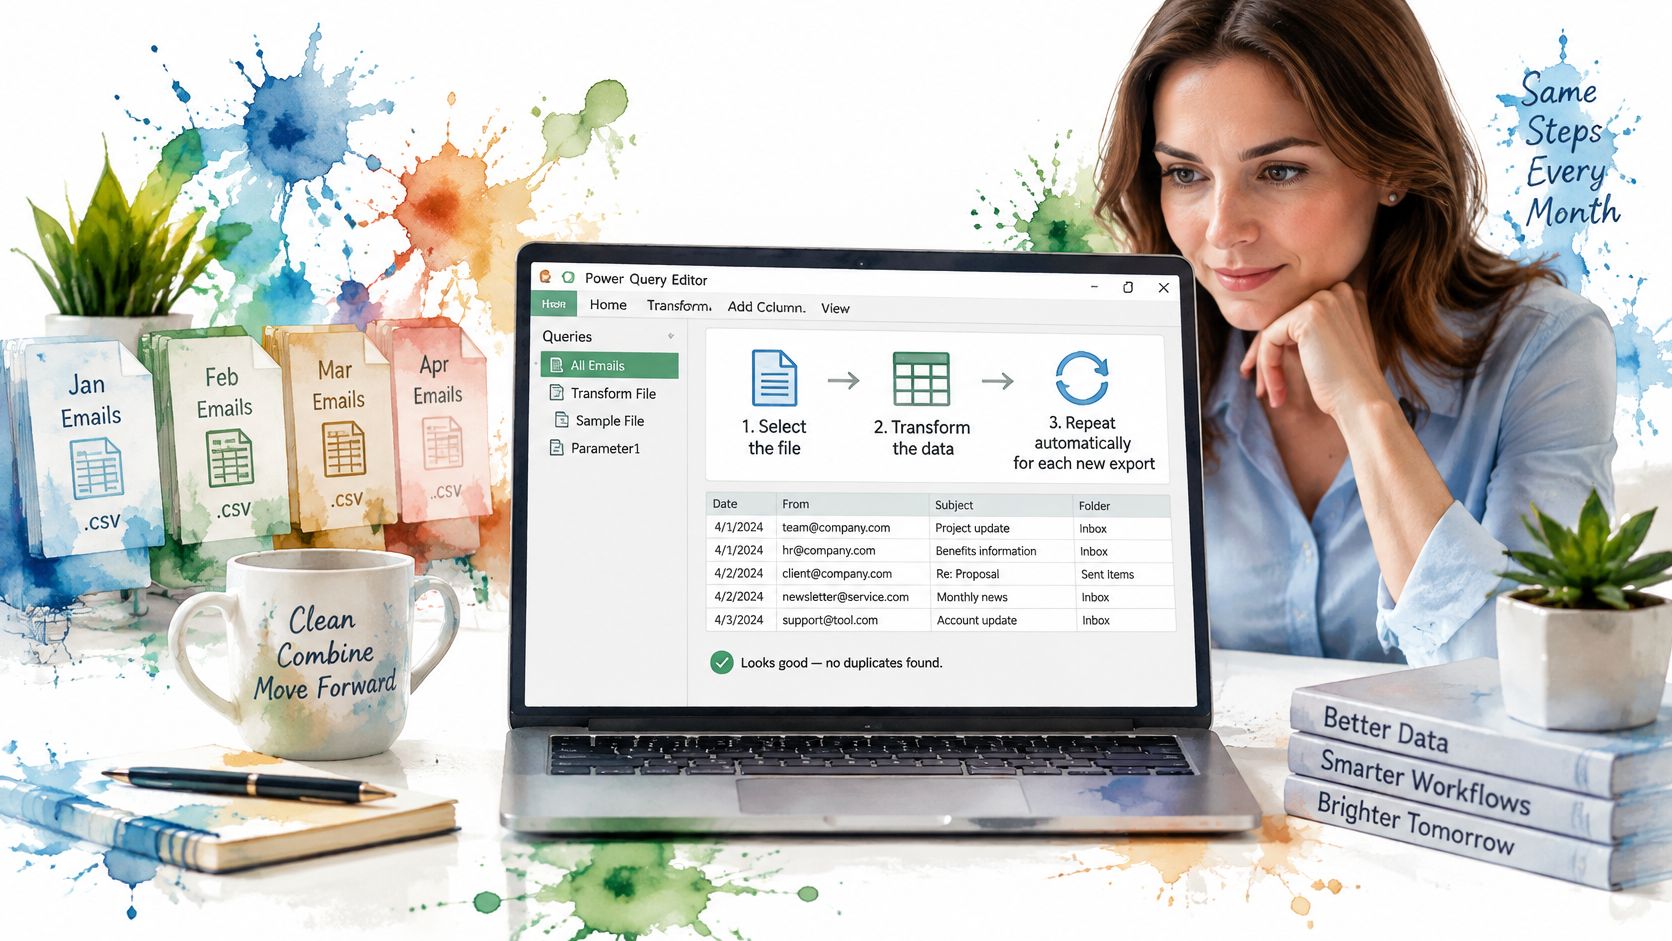
Build the saved routine
- Select the source table and choose Data > From Table/Range. Confirm the headers so the email field has a recognizable name.
- In the editor, select the email column. Use Transform > Format > lowercase, then Trim and, where needed, Clean.
- Exclude unresolved review entries through an explicit status field or a maintained review table. Retain a correction queue for malformed entries rather than discarding them.
- Select the email comparison column and choose Home > Remove Rows > Remove Duplicates.
- Choose Home > Close & Load To and load the result to a new worksheet.
Use this simple routine for address-only output. Power Query doesn't guarantee which duplicate record survives merely because you sorted the preview. If attached names, consent records, or preferences must survive, implement an explicit selection rule, such as grouping by address and selecting the approved record, before reducing the data.
This video provides a visual companion for working through the Excel cleanup interface.
Refresh without overwriting the output
When the next export arrives, replace the data inside the source table, adjust its size if necessary, and choose Data > Refresh All. Don't paste into the query result.
The transformations leave the source unchanged, but replacing the source table doesn't preserve its previous contents. Archive each incoming export separately. Finally, check the columns selected in the duplicate-removal step: they define the match, not every column retained in the output.
Confirm the Clean List Before You Send
Start with reconciliation, not a quick glance at the addresses. Microsoft's Remove Duplicates guidance describes the removal summary that lets you compare what Excel removed with what remains.
Use this acceptance checklist before releasing the file:
- Reconcile the rows. The working input count minus reported removals must equal the output count. If you excluded review entries first, reconcile those separately rather than treating them as duplicate removals.
- Recheck the sending key. Run COUNTIF against the final cleaned address range. For an address-level sending list, every nonblank address should return
1. - Inspect the structure. Keep an intact header, a single address per email cell, and the correct names beside any retained member fields.
- Check the archive. Confirm the original worksheet still holds the incoming records and the Review sheet preserves unresolved entries and retention decisions.
- Confirm permission. A distinct, well-formed address isn't evidence that its owner agreed to receive the mailing.
Release the sending list, not the whole register
For a group mailing, export only the fields the import needs. Hold back unresolved shared-inbox cases and malformed entries; don't make the entire group wait for corrections that can be handled separately. Keep sensitive membership notes out of the sending file.
At Listava, we can import an existing member list from an Excel sheet in under 30 seconds. Group members don't need accounts, and they receive and reply to emails as they normally do. Import only recipients who have explicitly consented to receive the group's messages.
Save the approved export under a new name, leave the backup unchanged, and record the comparison key and survivor rule in the workbook. These email list management practices help make the next handover manageable rather than another reconstruction exercise.
Before sending: You should be able to explain why each discarded record was removed and where its important information went.
Listava gives your group a shared email address that reaches its members through their existing inboxes. Once your Excel sending list is reviewed and deduplicated, visit us to bring it into a group where members can receive updates and reply without creating accounts.